Establishing events and responses
Our temperature converter app now looks reasonably functional, but doesn’t do anything yet. The next thing we need is for the Calculate button to be able to respond to a user action, such as a click.
Creating an event handler with code-behind
XAML files can be associated with a C# source file. This file is where you write event handling code for the button. This is called "code-behind".
- In your IDE, browse your project directory for Views → MainWindow.axaml → MainWindow.axaml.cs. This is the C# source file behind the main window XAML.
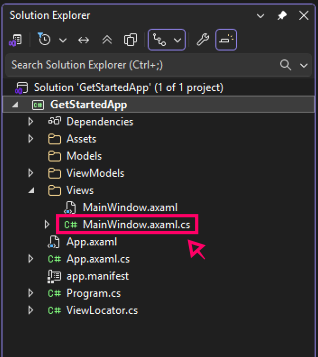
- Open MainWindow.axaml.cs.
- Locate the
usingdirectives at the top of the file. At this point, there should only be the single lineusing Avalonia.Controls;. Add these twousingdirectives:
using Avalonia.Interactivity;
using System.Diagnostics;
- Locate the line
public partial class MainWindow : Windowfurther down the file. This class currently contains only the constructor for the main window,public MainWindow(). Below the constructor, add the following code:
private void Button_OnClick(object? sender, RoutedEventArgs e)
{
    Debug.WriteLine("Click!");
}
- Your C# file should now look like this:
using Avalonia.Controls;
using Avalonia.Interactivity;
using System.Diagnostics;

namespace GetStartedApp.Views;

public partial class MainWindow : Window
{
    public MainWindow()
    {
        InitializeComponent();
    }

    private void Button_OnClick(object? sender, RoutedEventArgs e)
    {
        Debug.WriteLine("Click!");
    }
}
- Switch to your XAML file, MainWindow.axaml.
- Locate
<Button>near the bottom of the file. - Add
Clickas an attribute to the<Button>tag and associate it withButton_OnClick, like so:
<Button HorizontalAlignment="Center" Click="Button_OnClick">Calculate</Button>
Checking the event handler works
To verify we’ve created the event handler correctly, we can check the debug output to confirm "Click!" is being printed when we click the Calculate button.
- Visual Studio
- Rider
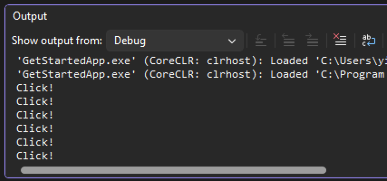
- Go to the Output window, located by default under the split view. From the "Show output from:" dropdown menu, select Debug.
- Run the app.
- In the running app window, click the Calculate button a few times.
- You should see "Click!" printed in the output window.
- Run GetStartedApp in debug mode.

- Open the Debug Output tab in the bottom panel.
- In the running app window, click the Calculate button a few times.
- You should see "Click!" being printed in the debug output in Rider.
On the next page, you will learn how to implement the formula that converts temperatures from Celsius to Fahrenheit.
See also
- Adding some layout: The previous step in this tutorial.
- Implementing the conversion: The next step in this tutorial.