建立事件和响应
我们的温度转换器应用程序现在看起来相当实用,但还无法做任何事情。接下来我们需要让 Calculate 按钮能够响应用户操作,例如点击。
使用后置代码创建事件处理程序
XAML 文件可以与 C# 源文件关联。这个文件是我们可以为按钮编写事件处理代码的地方。我们称之为"后置代码"。
- 在您的 IDE 中,浏览项目目录找到 Views → MainWindow.axaml → MainWindow.axaml.cs。这是主窗口 XAML 后面的 C# 源文件。
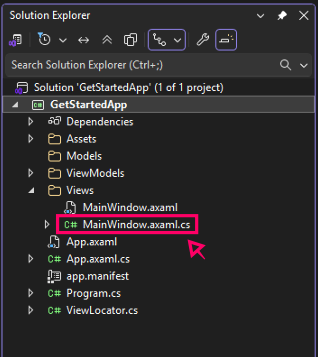
- 打开 MainWindow.axaml.cs。
- 找到文件顶部的
using指令。此时应该只有一行using Avalonia.Controls;。添加以下两个using指令:
using Avalonia.Interactivity;
using System.Diagnostics;
- 找文件下方的
public partial class MainWindow : Window行。此类当前仅包含主窗口的构造函数public MainWindow()。在构造函数下方,添加以下代码:
private void Button_OnClick(object? sender, RoutedEventArgs e)
{
    Debug.WriteLine("Click!");
}
- 您的 C# 文件现在应该如下所示:
using Avalonia.Controls;
using Avalonia.Interactivity;
using System.Diagnostics;

namespace GetStartedApp.Views;

public partial class MainWindow : Window
{
    public MainWindow()
    {
        InitializeComponent();
    }

    private void Button_OnClick(object? sender, RoutedEventArgs e)
    {
        Debug.WriteLine("Click!");
    }
}
- 切换到您的 XAML 文件 MainWindow.axaml。
- 在文件底部附近找
<Button>。 - 将
Click属性添加到<Button>标签,并将其与Button_OnClick关联,如下所示:
<Button HorizontalAlignment="Center" Click="Button_OnClick">Calculate</Button>
检查事件处理程序
为了验证我们是否正确创建了事件处理程序,我们可以检查调试输出,以确认当我们点击 Calculate 按钮时是否打印了 "Click!"。
- Rider
- Visual Studio
- 在调试模式下运行 GetStartedApp。

- 在底部面板中打开 Debug Output 选项卡。
- 在正在运行的应用程序窗口中,多次点击 Calculate 按钮。
- 您应该会在 Rider 的调试输出中看到 "Click!" 被打印出来。
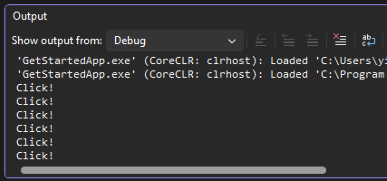
- 转到 输出窗口,默认位于拆分视图下方。从"显示输出来源:"下拉菜单中,选择 Debug。
- 运行应用程序。
- 在正在运行的应用程序窗口中,多次点击 Calculate 按钮。
- 您应该会在输出窗口中看到 "Click!" 被打印出来。
在下一页中,您将学习如何实现将温度从摄氏度转换为华氏度的公式。